3 Valentine's Day Chocolate Recipes | Easy + Simple

Valentine's Day is almost here and nothing says "I love you" like a homemade gift. Here are three delicious homemade chocolate recipes that are simple and easy to make: chocolate dipped figs, chocolate almond clusters, and heart-shaped peanut butter cups.


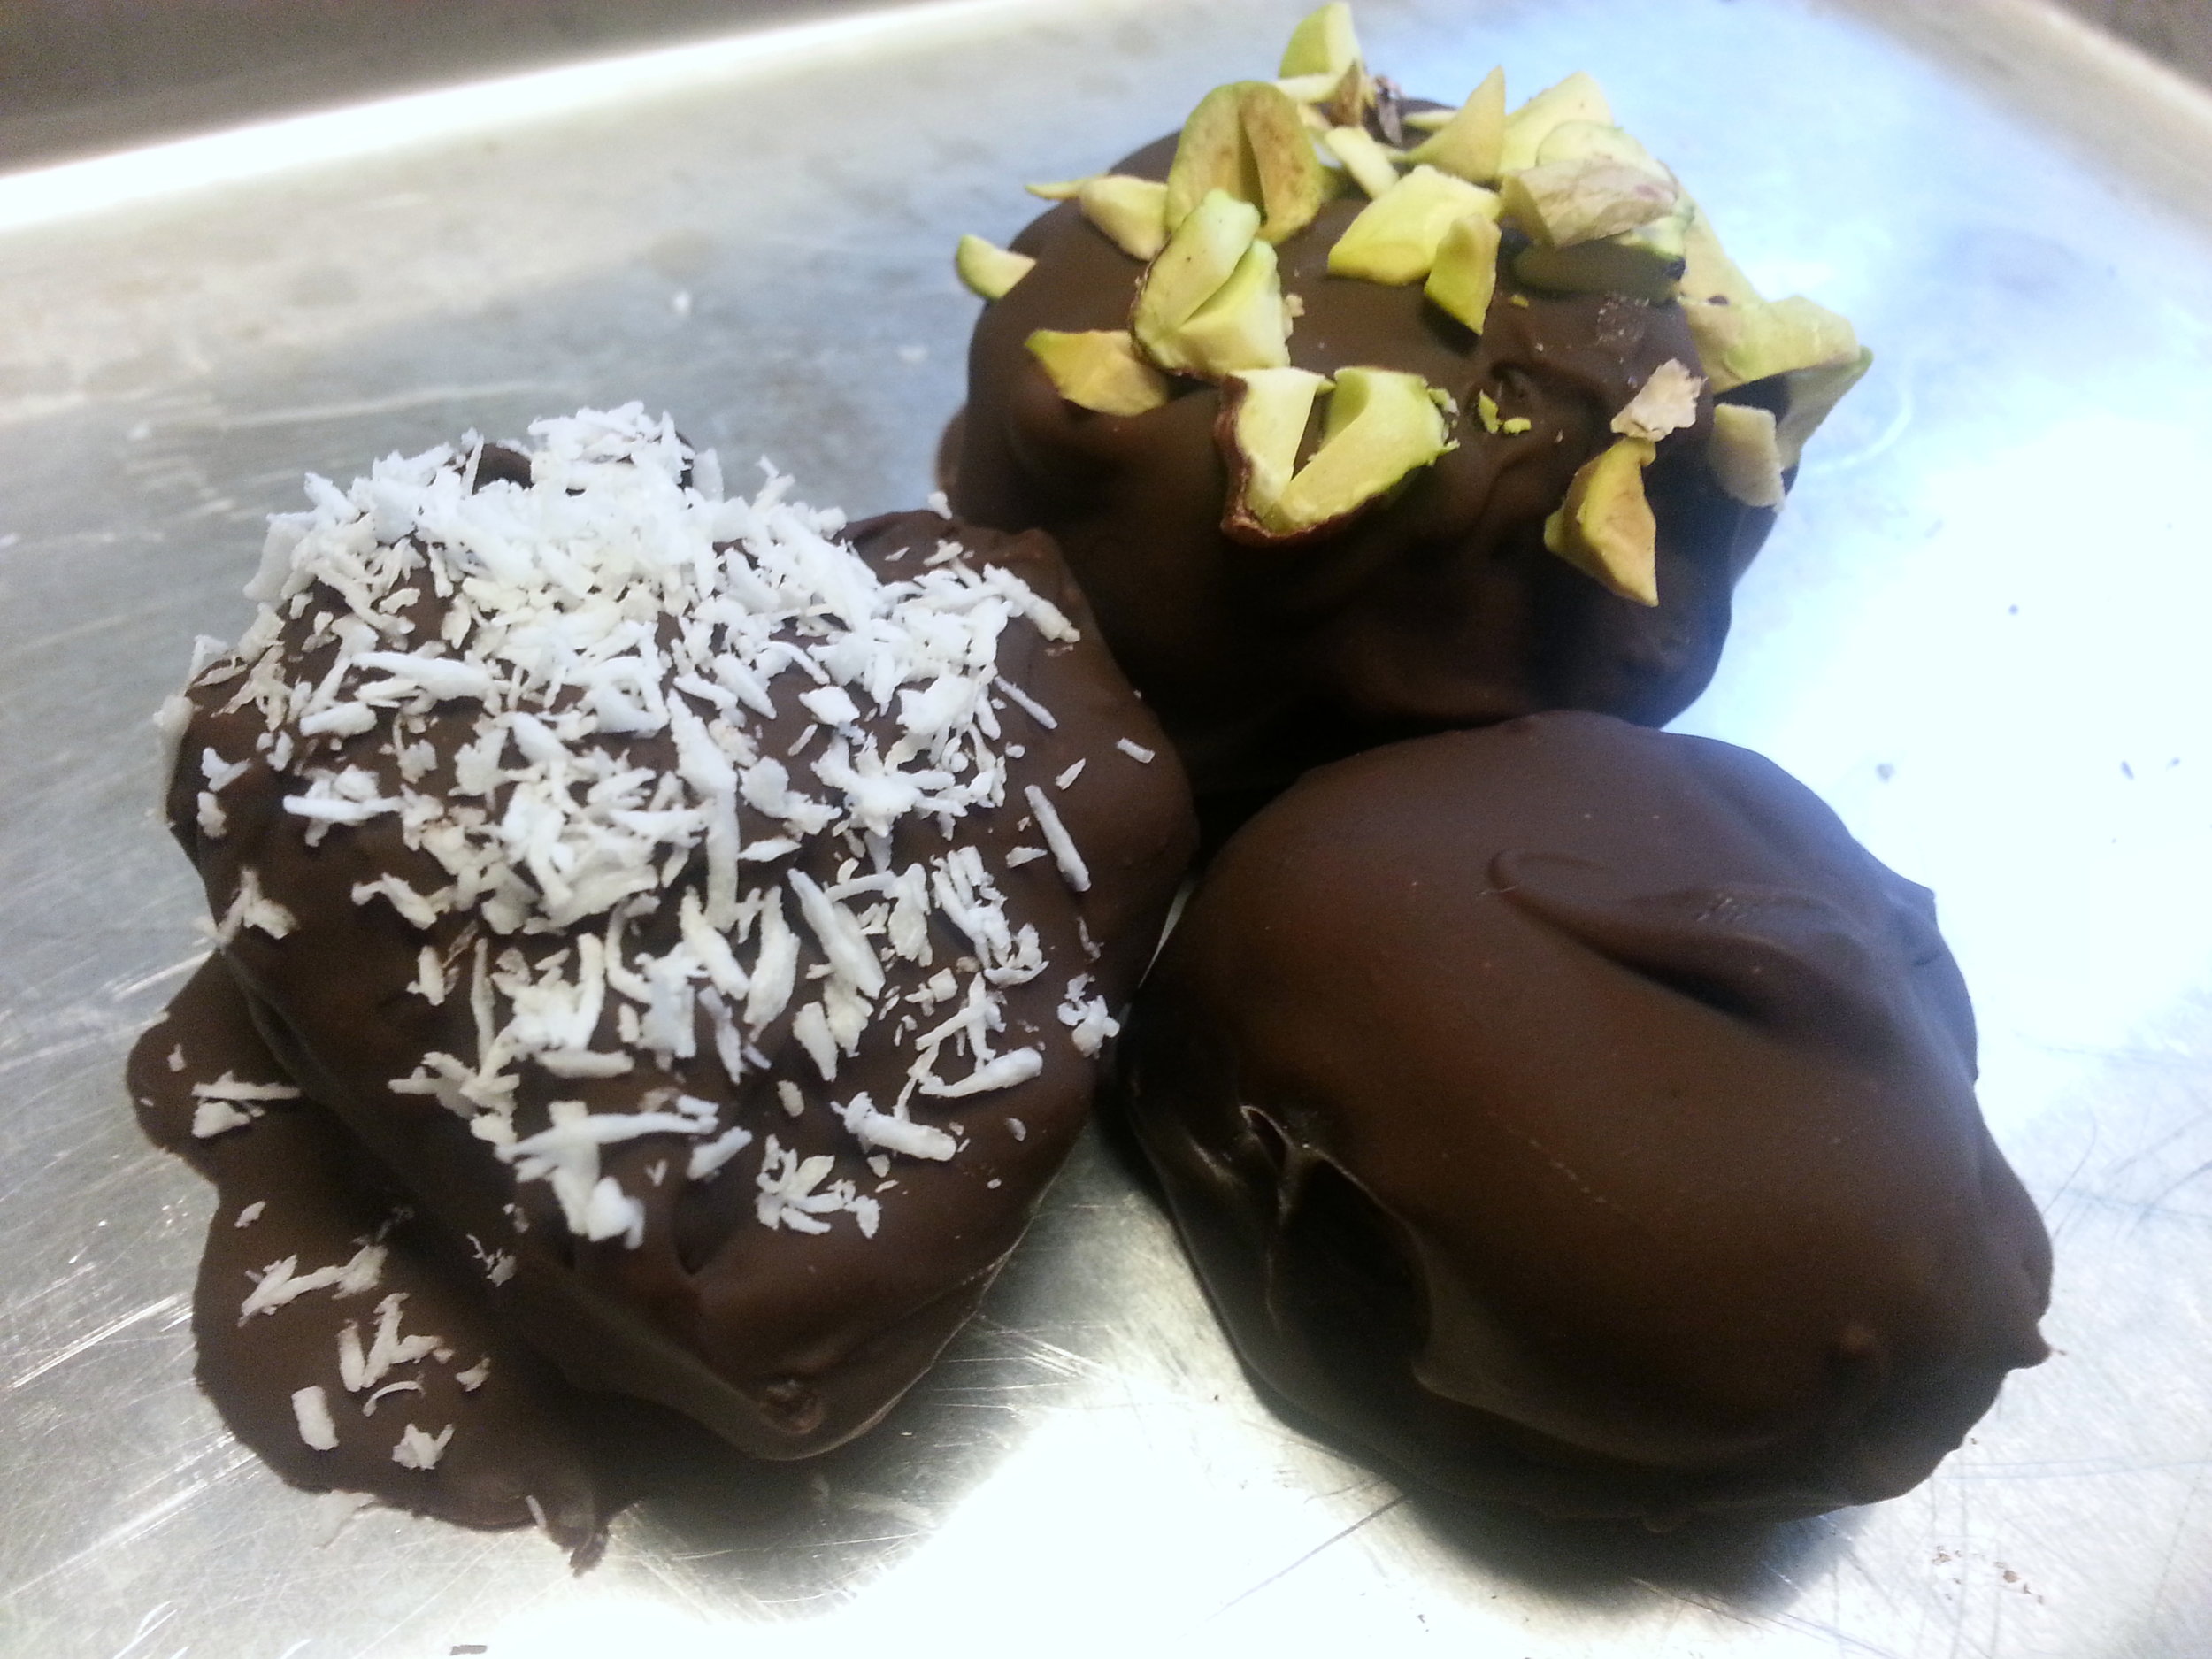
Chocolate Dipped Figs

Ingredients

2 ounces

chocolate chips, melted

12 dried figs

Directions

  1. Line a baking sheet or small cutting board with parchment paper.
  2. Holding the stem, dip a fig in the melted chocolate. Allow excess chocolate to drip off and place the fig firmly on the lined baking sheet. Repeat with the remaining figs.
  3. Refrigerate the figs until the chocolate has hardened, about 10 minutes.
  4. Remove the figs from the baking sheet and enjoy or store in the refrigerator.

Chocolate Almond Clusters

Ingredients

8 ounces chocolate chips, melted

1 cup raw almonds

Sea salt

Directions

  1. Add almonds to melted chocolate and mix until evenly distributed.
  2. Spoon dollops of chocolate almond mixture onto a lined baking sheet.
  3. Sprinkle clusters with sea salt.
  4. Refrigerate until clusters have hardened, about 20 minutes.
  5. Remove clusters from baking sheet and enjoy or store in the refrigerator.

Heart-Shaped Peanut Butter Cups

Note: Quantities vary depending on the mold you use. These are the quantities for my mold.

Ingredients

10 ounces chocolate chips, melted

1/4 cup creamy natural peanut butter

Directions

  1. Fill the heart-shaped molds about halfway with the melted chocolate.
  2. Place the mold in the the freezer for 10 minutes, or until the chocolate has solidified.
  3. Spoon about a teaspoon of peanut butter into the center of each heart, being careful not to let it touch the edges of the mold.
  4. Cover the peanut butter with the remaining melted chocolate and tap the mold on the counter a few times to even out the chocolate's surface.
  5. Place the mold in the freezer for 30 minutes, or until the peanut butter hearts have solidified.
  6. Take the mold out the the freezer, carefully remove the peanut butter hearts from the mold, and enjoy or store in the refrigerator.

Get the mold I used for the this recipe here.

Sarah Moran is a participant in the Amazon Services LLC Associates Program, an affiliate advertising program designed to provide a means for sites to earn advertising fees by advertising and linking to amazon.com.

Caramel Apples without Corn Syrup

Caramel apples without corn syrup Caramel apples are a fun fall dessert, but most recipes use corn syrup or other weird ingredients. Not this one! You can make caramel apples only using real, whole food ingredients and they taste amazing! Here's how.


[x_video_embed type="16:9"][/x_video_embed]


Caramel Apples

Ingredients

6 medium apples

1 cup heavy cream

1 cup Sucanat or other unrefined cane sugar

1/2 cup honey

4 tablespoons butter

1 teaspoon vanilla extract

Toppings such a crushed nuts or coconut (optional)

Special Equipment

Food/candy thermometer

Wooden sticks for handles

Directions
  1. In a medium sized sauce pan combine heavy cream, Sucanat, honey, and butter.
  2. Heat over medium heat, stirring frequently until all ingredients are dissolved.
  3. Once ingredients are dissolved, cook caramel, stirring constantly, until the it reaches 245°F.
  4. Remove caramel from heat, add vanilla extract, and stir to incorporate.
  5. Line a baking sheet with parchment, a silicone baking mat, or aluminum foil. Prepare apples by inserting sticks into stem ends and placing on lined baking sheet.
  6. Dip and roll apple in caramel until evenly coated. Once apple is coated, remove it from caramel and allow excess to drip back  into the pot.
  7. Place coated apple on baking sheet to cool. Repeat with remaining apples.
  8. Roll caramel coated apples in toppings, if desired. Place tray of finished apples in refrigerator to finish cooling.

The Easy Way to Cut a Pineapple

How to Cut Pineapple Cutting up a whole pineapple can be intimidating, but once you know how to do it, it's really easy! You don't even need any special pineapple corer or spiral cutter, just a knife and a cutting board. Fresh pineapple is the perfect addition to any summer party or get together. Learn how to cut one up yourself!


[x_video type="16:9, 5:3, 5:4, 4:3, 3:2" m4v="" ogv="" poster="" hide_controls="" autoplay="" embed='' no_container="true"]

Homemade Peanut Butter Egg + 2 More Easter Chocolates

Homemade Easter Chocolates Easter usually involves quite a bit of candy, so why not make some of that candy yourself? Today, I'm showing you how to make 3 different chocolate eggs: a milk chocolate peanut butter egg, a dark chocolate coconut egg, and a white chocolate lavender egg. Making these chocolates at home means you get to use the best quality ingredients and it's a fun activity for kids and grown-ups alike!


[x_video type="16:9, 5:3, 5:4, 4:3, 3:2" m4v="" ogv="" poster="" hide_controls="" autoplay="" embed='' no_container="true"]

DIY Natural Pink Food Coloring

Brightly colored foods are fun, but lots of them are made with artificial food coloring. You can make your own natural pink food coloring with common ingredients for beautiful colors that aren't bad for you. Here are two ways to make natural pink food coloring for Valentine's Day or any other day of the year. [x_video type="16:9, 5:3, 5:4, 4:3, 3:2" m4v="" ogv="" poster="" hide_controls="" autoplay="" embed='' no_container="true"]

8 Healthier Holiday Cookies | Real Food, No Junk

Holiday cookies aren't the healthiest thing ever, but you can make them way better by simply using whole, real ingredients and skipping the processed junk. Here are 8 real food cookie recipes that have all of the yummy cookie goodness you want, without all of the chemicals.
[x_video type="16:9, 5:3, 5:4, 4:3, 3:2" m4v="" ogv="" poster="" hide_controls="" autoplay="" embed='' no_container="true"]

Unrefined Sweeteners
White Sugar

Red, White, and Blue Popsicles

The 4th of July is almost here! There are lots of festive treats making their way around the internet, but most them rely on highly processed ingredients and chemical nasties. Yuck!  Instead, why not try these layered pops? They're the perfect way to cool down on the 4th, and aren't full of junk. All you need  is some fruit, plain yogurt, and a little honey. Red White Blue Popsicles

The measurements below are specific to my popsicle molds. If you have different molds, you can figure out how much you'll of each layer by using the following method.

Determine how many ounces each of your popsicle molds hold. Divide this number by three and then multiply by the total number of popsicles. This is how many ounces you will need of each layer. My popsicle molds hold 3 ounces each and there are 10 molds total, so I need 10 ounces of each layer.

Knowing how much whole fruit you'll need to get the correct amount of blended fruit is a little bit of a guessing game. My best tip is to start small and keep adding more until you get the correct amount.

Note: Even with all the measuring, your eyes will be your best guide. Things expand when they freeze and fruit can vary in size and water content. When you fill your molds, you want each layer to take up about a third of the mold, so keep that in mind. If you have left over yogurt or fruit puree, you can always use it for something else!

[x_video type="16:9, 5:3, 5:4, 4:3, 3:2" m4v="" ogv="" poster="" hide_controls="" autoplay="" embed='' no_container="true"]

Ingredients

1 heaping cup fresh or thawed frozen strawberries (raspberries or cherries would work too)

1 cup plain yogurt (learn how to make yogurt)

Juice of 1 lemon

3 tablespoons honey

1 heaping cup thawed frozen blueberries

Directions
  1. Puree the strawberries (or other red fruit) in a blender.
  2. Pour the strawberry puree into the first third of each mold being careful not to get the puree on the walls of the mold.
  3. Add your popsicle sicks and freeze until solid, about 6 hours.
  4. Combine the yogurt, lemon juice, and honey and whisk until combined.
  5. Pour the yogurt mixture into the molds on top of the frozen strawberry puree, filling up the second third of each mold.
  6. Freeze until solid, about 6 hours.
  7. Puree the blueberries in blender.
  8. Pour the blueberry puree into the molds on top of the frozen yogurt mixture, filling up the last third of each mold.
  9. Freeze until solid, about 6 hours.
  10. For serving, you have two options. You can remove the popsicles from the molds at the time of serving or you remove them ahead of time and wrap them individually in parchment or wax paper. The first is less work over all, while the second allows for effortless distribution at serving time.

Note: Alternatively, you can add all of the layers at once, as shown in the video above. This gives you some mixing between the layers and takes less time because you only need to wait for things to freeze one time.

What's you go-to dish for a summer party? Share in the comments below!

Recipe: Chocolate Truffles for Valentine's Day

Valentines Day is synonymous with candy and chocolates. This year, why not try giving your loved one a homemade version? These truffles are healthier than the store-bought version and can be customized to each person's exact tastes. Plus, a homemade treat always means more than something you pick up at the store. These truffles have a crisp chocolate shell with a soft and gooey chocolate-date center. They are seriously delicious and my only regret is that I didn't make a double batch. Healthy Homemade Truffles

Chocolate Truffles for Valentine's Day

Ingredients

12 dates, pitted

1 tablespoon carob powder, plus more for coating truffles

1 cups chocolate chips (I like the brand Enjoy Life because they are free of weird ingredients and allergens)

Fillings and toppings such as pecans, almonds, pistachios, and coconut

Directions
  1. Soak dates until very soft, an hour or more depending on how hard the dates are.
  2. Drain water from dates and process in a blender until smooth.
  3. In a small bowl, add the date puree and 1 tablespoon of carob powder. Stir to incorporate.
  4. With wet fingers, roll date paste into 12 truffles. As you roll each truffle, add any desired fillings. Then, roll the truffle in carob powder and set on a baking sheet.
  5. Once all 12 truffles have been formed and rolled in carob powder, put the truffles in the freezer to harden, at least 1 hour.
  6. Once the truffles have firmed up a bit, melt the chocolate chips in a double boiler or microwave. Dip each truffle into the melted chocolate to coat and then immediately sprinkle with any toppings. You may need to return the truffles to the freezer periodically as they begin to soften. If the truffles get too soft, they will start to come apart when you dip them and the chocolate won't coat evenly. As the consistency of chocolate can vary between brands and also depends on how much the chocolate cools during the coating process, you may find that you need a little more or a little less than the recipe calls for. Feel free to adjust accordingly.
  7. Once all of your truffles are coated in chocolate, return them to the freezer for at least 1 hour to set up. Store in the freezer or refrigerator.

Recipe: Healthy Strawberry Milkshake for Valentines Day

I have been on a huge smoothie kick here lately. Some of my experiments have turned out better than others, but this is a new favorite. A few simple ingredients and a wiz of the blender are all it takes. Dates provide  a subtle sweetness without any nasty backlash, like an upset tummy or a sugar crash. It also has a beautiful pink color (perfect for Valentines day) without any artificial colors or dyes. Plus, if it's this good with snow falling on the ground, imagine how great it will be once summer rolls around! healthy Strawberry Milkshake

Healthy Strawberry Milkshake

makes 1 serving

Ingredients

1 cup (140 grams) frozen starberries

3/4 cup milk

2 pitted dates

1/2 teaspoon vanilla extract

Directions
  1. Add all ingredients to a blender and blend until smooth.

Layered Chocolate Peppermint Bark Recipe

Chocolate Peppermint Bark This peppermint bark is something that my family looks forward to every year. The best part is, along with how good it tastes, it also happens to be pretty easy to make. Most recipes for layered bark call for semi-sweet chocolate, but I prefer unsweetened chocolate instead. Since white chocolate is basically pure sugar, and there is even more sugar added with the candy canes on top, I find it provides a nice contrast between the super sweet white chocolate/candy-cane layer and the bitter dark chocolate underneath. Whether you make this for yourself, or as a gift for others, it will definitely be a big hit!

[x_video_embed type="16:9"][/x_video_embed]

Layered Chocolate Peppermint Bark

Ingredients

12 oz unsweetened(100% cacao) baking chocolate

12 oz white chocolate

8 natural/organic candy canes

Directions
  1. Melt the dark chocolate in a double boiler or in the microwave until smooth.
  2. Poor the melted chocolate onto a parchment lined baking sheet and use a spatula to spread it into a thin layer. Refrigerate until solid.
  3. Melt the white chocolate in a double boiler or microwave until smooth. Allow it to cool as much as possible, while still remaining melted. This will ensure the dark chocolate layer doesn't soften and mix with the white chocolate.
  4. While the white chocolate is cooling, place candy canes in a plastic bag and crush into pieces using a mallet or rolling pin. Sift the crushed candy canes through a strainer to separate the very fine, sugar-like pieces from the larger chunks.
  5. Mix the fine candy-cane pieces into the white chocolate.
  6. Pour the white chocolate and candy cane mixture over the dark chocolate and use a spatula to spread the white chocolate as close to the edges of the dark chocolate layer as possible.
  7. Sprinkle the large candy cane pieces over the white chocolate and lightly press the pieces in with your fingers to help them better adhere.
  8. Return the bark to the refrigerator and allow the white chocolate layer to harden.
  9. Break the bark into pieces and store in the refrigerator.

Recipe: Peppermint Sugar

Candy canes are a staple for many this time of year. They make festive coffee and hot chocolate stirrers and are a favorite addition to holiday treats. However, it can be challenging to find candy canes that aren't full of corn syrup, artificial dyes, artificial flavors, and other nasty chemicals. While I prefer a natural candy cane because of the iconic shape and colors, you can make a substitute yourself if you can't get your hands on a high quality candy cane. Peppermint Sugar

Peppermint Sugar

makes approximately 1 cup

Ingredients

1 cup Sucanat/Rapadura sugar

1/4 cup water

1/2 - 1 teaspoon peppermint extract (depending on how minty you like it)

Directions
  1. Line a metal baking sheet with parchment paper and place in the refrigerator to chill.
  2. Meanwhile, add the sugar and water to a medium sauce pan and heat over medium low heat. Stir water and sugar mixture with a spatula as it heats to dissolve the sugar.
  3. Continue stirring and heating until the sugar starts to bubble. Then, continue to stir the sugar frequently as it cooks for 15 minutes.
  4. Remove sugar from the heat and stir in the peppermint extract. Make sure to stand away from the pot as your do this, because the peppermint extract hitting the hot sugar can take your breath away if you're not careful.
  5. Stir the sugar to ensure the peppermint extract is incorporated and poor it out onto your chilled, parchment-lined baking sheet.
  6. Use your spatula to spread the sugar into a thin (but not transparent) layer. Allow the sugar to cool until it is hard and does not bend. You can place it in the refrigerator to speed up the process if you like.
  7. Now it's time for the fun part: Breaking up your sugar! Cover the sugar with another piece of parchment and then use a mallet or rolling pick to break the sugar into pieces of your desired size. Use immediately or store in a thin layer to prevent the pieces from sticking together into a big mass. You can also put the pieces into a small blender and make a finely ground sugar for your coffee.

Recipe: Pumpkin Spice Cookies

Today's post is in keeping with the typical fall theme of pumpkin spice.  When making these cookies, I made sure to work with real ingredients, as usual. One thing I can't stand is those recipes (that you often see on Pinterest) where the image says something like "Easy Recipe With Only 2 Ingredients." It sounds interesting until you click and realize that one of the "ingredients" is a box of cake mix. Cake mix is not an ingredient people! I mean, it actually confuses me a bit. How hard is it to measure out flour, baking powder, baking soda, and spices? The boxed stuff just doesn't seem that much more convenient to me, especially when you consider the quality of ingredients that are typically used. Pumpkin Spice Cookies

Now that that's out of the way, on to the good stuff! These cookies are almost like baby cakes, as they have a delicate, fluffy texture. They're like soft, pillow-y clouds of pumpkin spice goodness. They're dessert, but not sickly sweet, and they are going fast at our house. :)

Pumpkin Spice Cookies

Pumpkin Spice Cookies

makes 36 cookies

Ingredients

2.5 cups whole wheat pastry flour

1 teaspoon baking soda

1 teaspoon baking powder

1/2 teaspoon salt

1 teaspoon ground cinnamon

1/2 teaspoon ground ginger

1/4 teaspoon ground nutmeg

1/4 teaspoon ground clove

1/4 teaspoon ground cardamom

1/2 cup butter

1.25 cups unrefined can sugar, such as Sucanat

1/4 cup maple syrup

3/4 cup pumpkin puree

1 large egg

1 teaspoon vanilla extract

Directions
  1. Preheat oven to 350 degrees Fahrenheit.
  2. Combine flour, baking soda, baking powder, salt, cinnamon, ginger, nutmeg, clove, cardamom, and salt in a bowl. Set aside.
  3. Cream together butter and sugar with a mixer.
  4. Add maple syrup to butter and sugar mixture and mix until incorporated. Then add pumpkin, egg, and vanilla extract and mix until combined.
  5. Gradually add dry ingredients to wet ingredients, mixing until fully incorporated.
  6. Drop batter in heaping tablespoons onto ungreased baking sheets. Baked for 15-18 minutes, or until done.

What kind of cookies do you prefer? Soft, chewy, or crunchy? Share in the comments below!

Recipe: Layered Melon Popsicles

Since I purchased the popsicle mold I mentioned here, I've been enjoying my healthy frozen treats often, as a snack or after-dinner dessert. This recipe uses one of my favorite fruits, the watermelon. I can eat and eat and never get tired of it. In college, my roommate once said "You know you live with a dietetics major when you find watermelon seeds in the couch cushions." It's just soooo gooood! In addition to highlighting this beloved food, I'll teach you how to make layered popsicles. They look super fancy and really aren't all that difficult to make. It takes a little more time and patience, but you're already in for some waiting if you're making popsicles anyways. Mine ended up a little uneven on this batch, but I like to just call that "rustic." The amounts in this recipe are specific to my mold, but you can easily adapt it to whatever mold you have, even if that's just an ice cube tray. Pop1

mold My mold. It makes 10 pops and has a handy lid to keep the sticks in place. You can learn more about it here. watermelonblender The great thing about melon is they liquefy easily. No worries about having to get in a fight with your blender. pouring layers The key to these is freezing the layers separately so they don't mix. Into the freezer we go! melon1 melon2 This is the other melon I used. I got it at the market, but I don't know what it's called. Let me know if you have any guesses! layers2 I love the contrast between pink and green melon. Cantaloupe would be nice too if you're a fan of the pink/orange combo. pop I added the final layer and this is the result! These look so pretty I almost don't want to eat them. Almost. Check out the recipe below.

Layered Melon Popsicles

makes 10 servings

Ingredients

3 cups cubed watermelon, seeded 1.5 cups cubed honeydew or other similar melon

Directions
  1. Put your watermelon in a blender and process until liquefied. Transfer liquid to a measuring cup.
  2. Pour watermelon liquid into molds until 1/3 full.
  3. Place lid on mold and insert popsicle sticks. Freeze until solid, approximately 6 hours.
  4. When ready to add next layer, repeat steps 1-3 with honeydew, minus the part about the popsicle sticks because they're already in place.
  5. Once honeydew layer is frozen, finish off your pops with the rest of the watermelon liquid and freeze in the same fashion.
  6. Once pops are frozen, remove from mold and enjoy!

NNMC Toss the Junk: Ditch Trans Fat

You've likely heard about the danger of trans fats on the news or seen products that proudly display "0 grams of trans fat per serving" on their packaging. But what are trans fats and how bad are they really? First, we need to start with a little chemistry. Fatty acids can either be saturated or unsaturated. These terms refer to the carbon-hydrogen bonds in the fatty acid chain. When a fatty acid is saturated, each carbon in the chain has the maximum number of bonds (4) while unsaturated means that there are less than 4 bonds, resulting in double bonds. So, saturated fats are holding all of the hydrogen they can and unsaturated fats are not. These differences impact the structure of the fat and, therefore, the way it is processed in the body. Trans fats occur when the hydrogens in an unsaturated fat are across from each other rather than next to each other. While this does occur naturally in minimal amounts, the man-made kinds are the ones that have been found to be harmful. In fact, research published in the New England Journal of Medicine has shown that a 2% increase in calories from trans fat increases your risk of heart disease by 23%!

Man-made trans fats are created though a process known as hydrogenation. Oils are pumped with hydrogen to create solid fats, resulting in the production of trans fat. This is beneficial to food companies because trans fats are much more stable than other fats. This means that a product can last on the shelf for a longer period of time, reducing waste and saving money. This is, however, at the detriment to our own health.

So how do we avoid these unhealthy fats? Obviously, if you're eating whole foods this shouldn't be much of an issue. However, packaged foods are a whole different story. This is due to labeling regulations that can really mess you up. If a product has less the 0.5 grams of trans fat per serving, it can be listed on the label as having 0 grams of trans fat. So, if you eat 2 or 3 servings of one of these foods or eat several different foods throughout the day that fall into this category, you could be getting a significant amount of trans fat in your diet. Scary right? The way to avoid this is reading the ingredients list. This is where the true identity of a product always comes through. If you see the words "hydrogenated" or "partially hydrogenated" this is your sign that trans fats are present and you need to just step away.

Whipped topping that is "cool" and comes in a tub (you know what I'm talking about) is one product that contains trans fat. This is most frustrating because it is often marketed as healthy choice due to it's low calorie content. This is a perfect example of where is is important to remember that calories aren't everything when it comes to health and ingredient reading is important. Instead of using this product, I recommend making your own homemade whipped cream. Yes, it is high in calories, but if you use it as an occasional treat and don't go overboard, you should be fine. Plus, it will fill you up pretty quick due to the high fat content.

Homemade Whipped Cream

Ingredients

1 cup organic heavy whipping cream

3 tablespoons powdered sugar

1 teaspoon vanilla extract

Directions

1. Add cold whipping cream to a bowl.

2. Whip cream with electric beaters (or by hand if you want a workout!) until it starts to thicken.

3. Add sugar and vanilla extract and beat until stiff peaks form.