How to Make Pumpkin Puree

How to Pumpkin Puree 
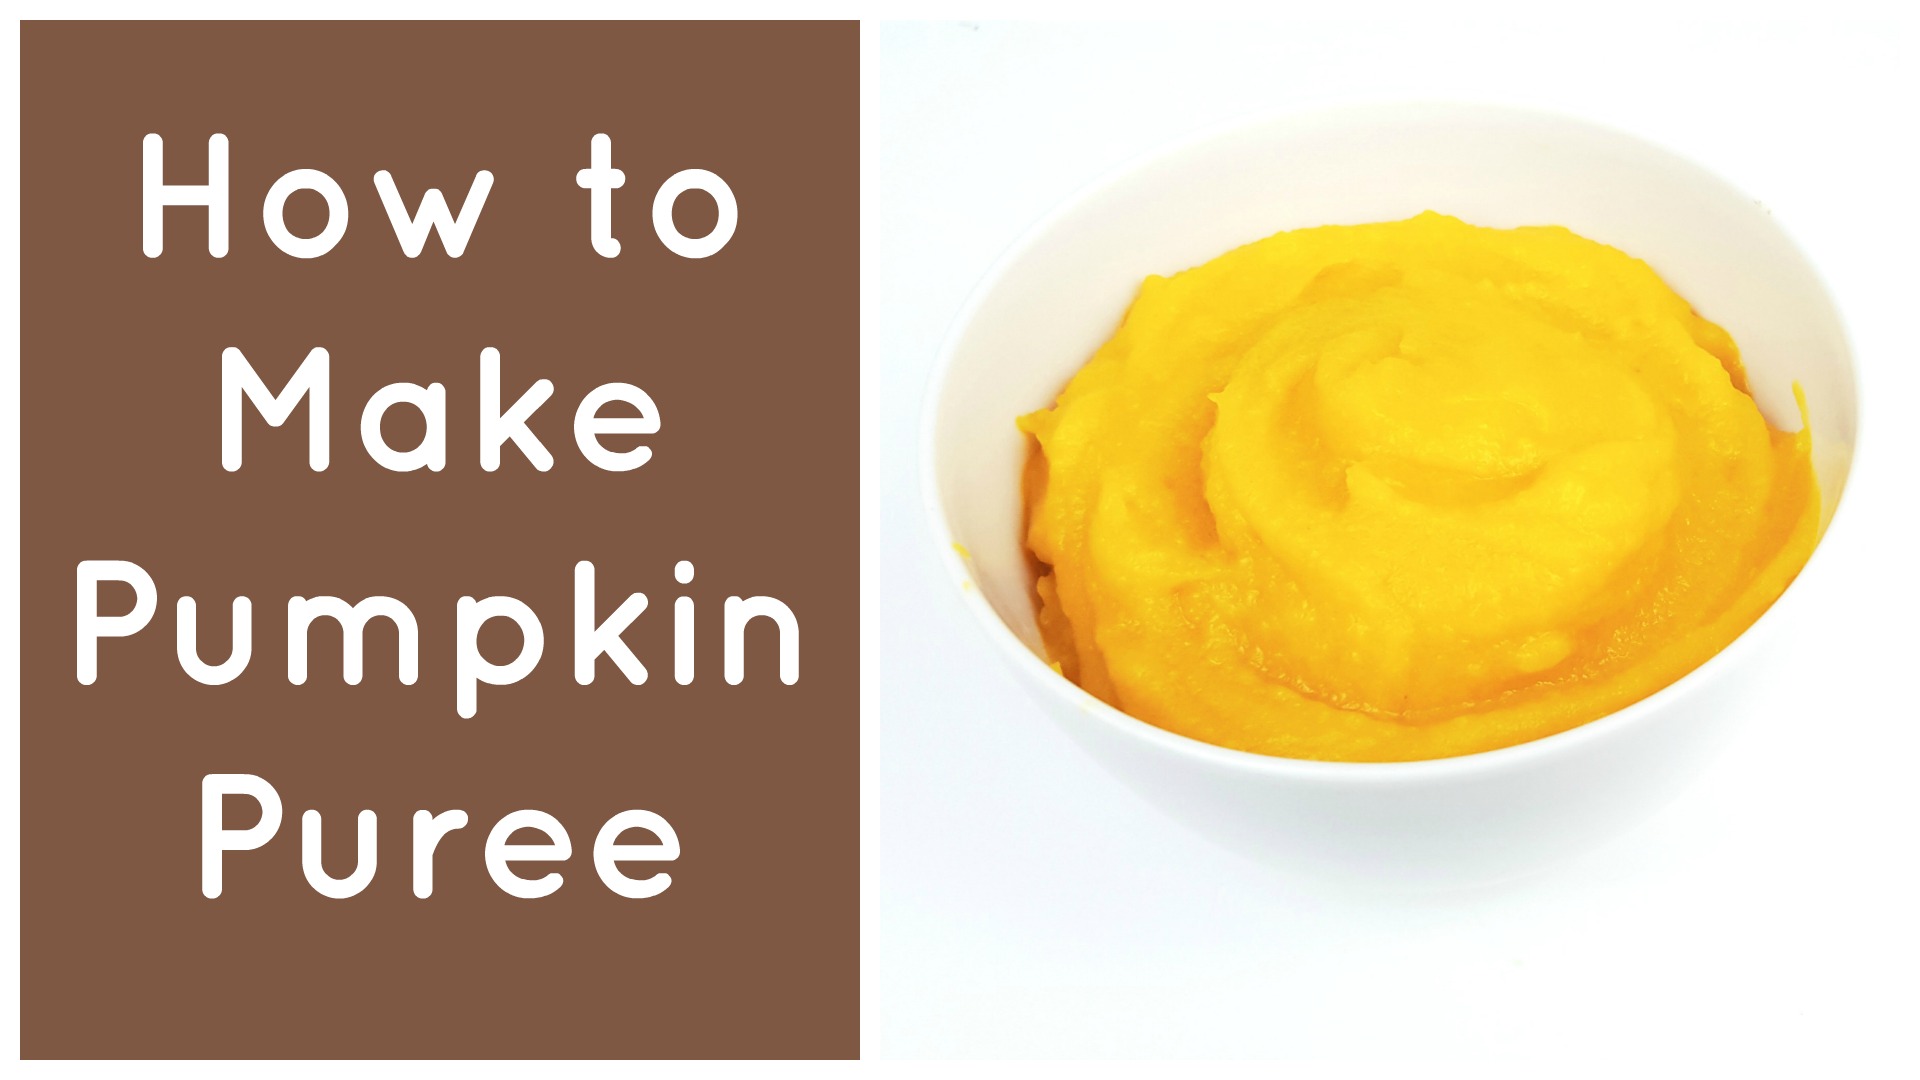
Fall means pumpkin everything! If you're a pumpkin fan, why not make your own pumpkin puree at home? It's simple, easy, and you can use it the same way as you would the stuff from the can.


[x_video_embed type="16:9"][/x_video_embed]


Pumpkin Puree

Ingredients

1 or more whole pumpkins

Directions
  1. Preheat oven to 400°F.
  2. Remove stem from pumpkin and cut pumpkin in half.
  3. Removes seeds and pulp from pumpkin with a spoon, ice cream scoop, your hands, etc. Set seeds aside to clean and roast later.
  4. Slice pumpkin into smaller sections for roasting. If using a small pumpkin, slice into quarters.
  5. Place pumpkin sections skin-side down on a baking sheet and roast in the oven for 40 minutes or until done. Depending on how thick your pumpkin is, it might take a little longer. You'll know the pumpkin is done when you can easily pierce the pumpkin flesh with a fork.
  6. Remove pumpkin from the oven and allow to cool.
  7. Once cooled, removed pumpkin flesh from the skin with a spoon (or your hands) and place in a blender or food processor. Blend until smooth.

Save Money with a Local, Real Food Fat

how to render lard Lard gets a bad rap, but it's a great cooking fat when you get it from pastured pigs. You just have to learn how to render it. The good news is, the rendering process isn't complicated or difficult to do. Here's some background on lard and a tutorial to render it yourself.


[x_video_embed type="16:9"][/x_video_embed]

How to Make Chicken Bone Broth in a Slow Cooker

Making bone broth is a great way to get more nutrients, save money, and make meals that taste delicious. Good news is, it's super easy to do in a slow cooker or Crock Pot! You get to go about your day while a yummy pot of broth simmers away on your counter.


Slow Cooker Chicken Bone Broth


Ingredients

Bones from one chicken

Assorted broth veggies like celery, carrot, onion, garlic, and herbs (whatever you have is fine)*

12 black peppercorns

Salt (to taste, I probably use about a teaspoon)

Splash of apple cider vinegar

Water


Directions

  1. Add all ingredients to your slow cooker with enough water to cover everything. Put on lid and cook on low for 12 to 24 hours.
  2. Once broth is done, turn off slow cooker and allow broth to cool a bit. Then, strain the broth into jars or containers to remove solids. Store broth in the refrigerator if you want to use it within the next few days or the freezer to save for later.

*Note: I keep a bag in my freezer for storing vegetable scraps like onion peels, carrot ends, and celery ends. Then, whenever I make broth, I can just go in my freezer and toss some of these veggies in the slow cooker. This saves money and time. Other scraps you can keep in this bag include garlic ends, asparagus ends, ginger peels, and fresh herbs that you won't be able to use up before they go bad. Don't include cruciferous veggies like cabbage, broccoli, and cauliflower because they can make things a little stinky.

Homemade Mayo without Raw Eggs

Egg Free Mayo Let's be honest; store-bought mayo is gross. Even the organic versions are full of artificial junk. You can make your own mayonnaise at home, but it does take some time and elbow grease. Plus, you can't store it for very long because it contains raw egg. I'm not against homemade mayo by any means, but, most of the time, I don't really feel like dealing with it.

That's where this recipe comes in! I was trying to come up with a spread for the BLTs we've been making and this was born. Now, it doesn't taste identical to traditional mayo, but it is yummy and an excellent substitution. And the best part is, it's super easy.

[x_video type="16:9, 5:3, 5:4, 4:3, 3:2" m4v="" ogv="" poster="" hide_controls="" autoplay="" embed='' no_container="true"]

Egg Free Mayo

makes about 3/4 cup

Ingredients

1.5 cups plain yogurt

1 teaspoon Dijon mustard

1 teaspoon white wine vinegar

1/4 teaspoon garlic powder

1/4 teaspoon salt

Directions
  1. Line a colander with paper towel and place over a bowl. Pour yogurt into colander and allow to strain until thickened, about 4 hours. This should give you about 3/4 cup of strained yogurt when you're done.
  2. Once yogurt is thickened, transfer to a small bowl with mustard, vinegar, garlic powder, and salt and mix to combine.

Recipe: Ranch Dressing

Salad dressing is really something you shouldn't waste your money on at the grocery store. Even the best ones have additives you'd never use at home and making it yourself is incredibly easy. Most people are familiar with making oil and vinegar based dressings at home, but the creamier ones, like ranch,  seem a little more complicated. Well I'm here to tell you that making your own ranch dressing is super simple and you likely already have all of the ingredients in your pantry. You can use this dressing any way you would use the bottled stuff and, as always, can personalize it to your own taste. Ranch Dressing Recipe

I like to mix and store mine in a pint sized mason jar. You can use the markings on the side of the jar to measure your yogurt and it looks nice for serving. This means you eliminate a measuring cup, mixing bowl, and serving container when it comes to dish washing time.


Ranch Dressing

Ingredients

1 pint sized mason jar (optional)

1.5 cups pastured, whole milk yogurt (learn how to make your own yogurt)*

2 teaspoons Dijon mustard

1.5 teaspoons dried minced onion

1 teaspoon garlic powder (not garlic salt!)

1 teaspoon red wine vinegar

1/4 teaspoon salt

*Note: If you'd prefer a thicker dressing, you can strain your yogurt in a colander lined with paper towels or a clean cloth set over a bowl. Alternatively, you could use a Greek style yogurt.

Directions
  1. Pour the yogurt in the mason jar, using the markings on the side to measure 1.5 cups. If you don't have a jar, you can use a measuring cup and small bowl.
  2. Add all of your other ingredients to the jar and mix with a spoon or whisk to incorporate.


Delicious Guacamole Recipe for the Super Bowl!

Delicious guacamole recipe! A good guacamole recipe is a must have in my book. Not only is it easy to make, but it's delicious and versatile. Think beyond the usual chips and burritos and try it as a great addition to eggs, on a piece of toast for a snack, or as a spread on sandwiches and wraps. Plus, with the Super Bowl coming up, guacamole is a quick and easy dip that is always a crowd pleaser.


[x_video_embed type="16:9"][/x_video_embed]

Guacamole

makes approximately 2.5 cups

Ingredients

4 avocados, seeded and peeled

1/2 medium onion, diced

1 jalapeno, seeded and minced

1/4 cup fresh cilantro, minced

1 clove of garlic, minced

1/2 teaspoon salt

Juice of 1-2 limes

Directions
  1. Add all ingredients to a bowl and mash to desired consistency with a potato masher. If you prefer a smoother guacamole or want to skip on some of the chopping, you can alternatively mix all of the ingredients in a blender or food processor.

How To Make Yogurt at Home

yogurtbreakfastToday I have something super exciting to share with you guys! For the past month or so I've ventured into the world of yogurt making and, let me tell you, it's amazing! Now, if you know me well, you know that I'm a big fan of making things yourself. Store-bought foods usually don't stand up in terms of flavor or what's good for your health. Despite this, yogurt making seemed a little too daunting for me. I mean, super weird people make their own yogurt right? Well I'm here to prove that wrong! Or to prove that I'm super weird. I'll let you decide. For the past couple years, as I've gotten deeper into the real/whole foods world, I've seen things about people making their own yogurt. Some used special yogurt machines and others took a "try this, it kinda works, cross your fingers" type of mentality. Neither of these appealed to me. I'm not into specialty, one-purpose equipment. It takes up space and doesn't give a great value in terms of versatility. Also, the type A and food safety side of me thought that approximate recipes for something that involves GROWING BACTERIA simply wouldn't cut it.

Since Jasen and I got married I've been cooking more than ever (another extra-hungry mouth to feed) and I've been more aware of our food budget. Somehow, the idea of yogurt making came back to the front of my mind. I mean, it had to be doable. Grocery stores are a new thing in the context of human history. Making this stuff yourself was once the normal thing to do. Plus, most store bought yogurt contains an additional ingredient, pectin, to make it thicker. Oh, and did I mention making it yourself is also cheaper? Sign me up! After some perusing on the internet, I've found a method that works well (I've made 4 or 5 batches) and doesn't make me worry about our safety. Plus, it's really not that hard at all! All you need is some milk and a little plain yogurt to start you out. Then, you can use your own yogurt as the starter for subsequent batches.

You simply pour your milk into a pot (I use a non-homogenized milk from this creamery) and get it heating up. A slow and steady heat would probably be best, but sometimes I'm impatient and put it on high. Use a thermometer to monitor the temperature. I prefer a candy thermometer that clips on the side of the pot for convenience.

yogurtmilkheating

A skin can form on top, especially if you're using a non-homogenized milk. Some people throw this out, but I'm not trying to waste stuff, so I just stir frequently to prevent the skin from forming in the first place. Once, your milk reaches 185 degrees Fahrenheit (this kills other bacteria that could compete with your culture), take it off the heat and let it cool to 110 degrees Fahrenheit.

yogurthotmilk

Then it's simply a matter of adding your culture (aka yogurt), mixing well, and putting in your oven to do its thang. Make sure you don't add the yogurt before the milk is cooled, or you could kill the bacteria you're trying to grow. Wrap your pot in a towel and turn on the oven light. This creates enough heat in the closed oven to incubate the yogurt. I let it sit over night so it can work undisturbed.

yogurtinoven

When it comes out, it'll look like this! Mine is yellow on top because the fat in the non-homogenized milk has risen to the top.

yogurtfinished

Then I simply give it a stir and put it in some jars to be refrigerated. It's super yummy and there is something so satisfying about knowing you made it yourself!

yogurtjars

Homemade Plain Yogurt

makes 2 quarts

Ingredients

1/2 gallon of milk

1 tablespoon plain yogurt

Directions
  1. Pour milk into a large pot with a thermometer attached or near by.
  2. Heat milk until it reaches 185 degrees Fahrenheit, stirring often to prevent a skin from forming.
  3. Allow milk to cool to 110 degrees Fahrenheit, stirring often to speed up cooling and (again) prevent a skin from forming.
  4. In a glass or liquid measuring cup, add the yogurt and some of the warm milk. Mix until the yogurt is completely incorporated. Pour this mixture into the pot and mix with a spoon to distribute it throughout.
  5. Place pot in the oven uncovered, wrap in a towel, and turn on the oven light. Close the oven and allow to sit for 10-12 hours.
  6. Remove pot from oven, transfer yogurt to containers, and refrigerate.
  7. Feel awesome about how cool you are that you just made your own yogurt!

How do you guys feel about making your own yogurt? Have you ever tried it before? Share in the comments below!

Recipe: Classic Hummus

I love hummus. It's great for dipping vegetables and also the secret to a killer veggie sandwich. I've tried a lot of brands in the grocery store (and I definitely have my favorites), but I've been on the search for a good homemade recipe for a while. You guys know I like to make everything myself that I can, plus homemade things usually taste better right? On my hummus search I've tried a few recipes and none were inedible, but they still never tasted quite as good as what I could buy in the store. Part of me said just suck it up! It's cheaper and better for you and it doesn't taste bad, just not great. Stop being whiny! But, when you're already doing a lot of cooking, it can be hard to find the motivation to put the time into making something that doesn't even taste that amazing. So, after some experimenting, I've come up with a recipe that, in my opinion, in the best one out there. Classic Hummus Recipe

Classic Hummus

makes approximately 2 cups

Ingredients

3/4 cup dried chickpeas or 15oz can (if you canned, start with step 4)

1/3 cup chickpea cooking liquid or water

4-5 tablespoons sesame tahini

2 cloves garlic

Juice of 1 lemon

1/2 teaspoon cumin

1/2 teaspoon salt (or to taste)

1-2 tablespoons extra virgin olive oil

Directions
  1. Soak dried chickpeas in water overnight.
  2. Drain chickpeas, add to a sauce pan, and cover with fresh water. Bring to a boil for 5 minutes, then simmer partially covered for 30-45 minutes, or until chickpeas are tender.
  3. Drain cooked chickpeas, reserving 1/3 cup of the cooking liquid
  4. Add chickpeas, half of reserved cooking liquid/water, tahini, garlic, lemon juice, cumin and salt  to a blender or food processor and blend. Gradually add the remaining liquid and continue blending until you reach your desired consistency (sometimes the chickpeas hold on to more water, so adding the water gradually ensures you don't end up with runny hummus). Taste for salt and adjust if needed.
  1. Stir in olive oil or drizzle it on top for serving. Enjoy!

hummus

Watch the video below to see me make this recipe and hear about some possible variations.

[youtube=http://youtu.be/2rtpO7UJk4k]

Have you ever struggled to recreate a favorite food or recipe? Let me know in the comments below!

Slow Cooker Stock

I'm a huge fan of making your own stock. Vegetable, chicken, or otherwise, it's a great way to save money and inject meals with extra nutrition and flavor. Up until a couple weeks ago, I always made my stock in a large pot on the stove top. I even wrote a post about it. However, I have recently been converted to a new method: making stock in the slow cooker. It's easier, and you don't have to worry about baby sitting a pot or things boiling over. crockpot

As I mentioned in my previous post on this topic, I collect veggies scraps as I cook meals and add them to a bag in the freezer until it's stock making time. Things like the ends of onions, carrots, celery, mushrooms, and asparagus all stay snuggled up in my freezer, along with fresh herbs that were about to spoil, waiting for me to use them. Just stay away from stinky veggies like broccoli or cabbage. Of course you can make your stock with fresh ingredients as well, but the frozen scrap collector version makes me feel much more savvy. I mean, you're basically getting something for nothing. What would have been compost or trash becomes food! Every time I make stock I get super excited about this fact and always tell Jasen about how cool it is. He plays along. :)

To make your stock, simply add your chicken carcass (if using) and your veggies until the slow cooker is full, then toss in a couple bay leaves and salt to taste. I usually do 1 teaspoon of salt, but, remember, you can always add salt when you cook with the stock later, so better to add too little rather than too much here. Pour in enough water to cover everything, put on the lid, and then cook on low for 8-24 hours. I like to do this right after our chicken dinner and let it go over night. It's always nice to wake up to a house that smells like soup.

stockinpot

Filter your stock using a fine mesh strainer or unbleached coffee filter. You can then refrigerate your stock if you'll be using  it soon, or freeze it for later. I've been freezing mine in jars for easy and plastic free storage.

stockinjars

Note: These jars were refrigerated. When freezing, be sure to leave plenty of room for expansion.

You can use your stock to make soup (obviously) or in any recipe that calls for it. It can also be used instead of water when cooking rice or other grains to add extra flavor.

Do you have any money-saving cooking tips? Leave them in the comments below!

Homemade Pumpkin Puree!

It's that time of year when the air is cool and pumpkins abound. But how many of us have gone to the store and bought a can of pumpkin puree without a second thought? I know I never really considered where the stuff came from, much less that I could make it myself. It must be hard right? That's why they sell it in a can. Well, last year, I learned just how wrong I was.

Let me set the stage. It' s a cool autumn day and I'm doing my weekly volunteering at the local farmers market. As I'm perusing the aisles, I see round, petite pumpkins at one of the farmer's stands and overhear his conversation with another customer. "These are sugar pumpkins. They're for making pies." Suddenly, I had a revelation. I could make a pumpkin pie from an actual pumpkin! Right then and there it was decided; I would make a pumpkin pie for Thanksgiving from a real pumpkin. Needless to say, the rest is history. Everyone was impressed and, even better, it was really easy!

The puree can be used for the obvious pumpkin pie, but go ahead to use it in other pumpkin recipes too or make up your own. This recipe uses one pumpkin, but feel free to a cook few at one time. I always do!

Pumpkin Puree

makes approximately 1.5 cups

Ingredients

1 sugar pumpkin

Water

Directions

1. Preheat oven to 400°F.

2. Use a paring knife to stab slits in the pumpkin. This will allow steam to escape during the cooking process so you don't end up with an explosion.

3. Place pumpkin in a baking dish with about an inch of water on the bottom.

4. Roast for 1 hour and 15 minutes.

5. Remove pumpkins from oven and allow to cool.

6. Once cooled, use a knife to cut a hole around the pumpkin stem (like you would if you were carving). This should be easy as the flesh will be soft. Using a spoon, scoop the seeds out of the pumpkin. Then, peel away the skin, which should slough right off.

7. Cut pumpkin into chunks and place in blender. Puree until smooth.

8. Use puree immediately, refrigerate, or freeze for later use.

Get the Most Out of Your Food Dollars: Make Stock!

*Update: While this is still a fine method for making stock, I've discovered a new method that I prefer: the slow cooker. It's much easier and practically foolproof.  If you have a slow cooker, click here for more info on that version One of the biggest complaints about eating healthy, whole foods is the cost. And while fresh produce and organic meats can be expensive, you can make your money stretch a little farther by making stock from food scraps. Now, that might not sound too appealing, but, calm down, I'm not talking about boiling down the leftovers on your plate. I'm talking about using those odds and ends that we pay for but throw in the trash or compost every day such as carrot and celery ends, mushroom stems, the woody pieces of asparagus, fennel fronds, onions peels, and the leftover carcass from a whole chicken. These little bits are full of flavor and nutrition and can be used to make a great vegetable or chicken stock that can be frozen and then thawed to use in recipes or in place of water to cook brown rice, couscous, and quinoa. It's as simple as keeping a bag in the freezer to store all of those little veggie pieces and, when it's full, simmering the contents in a big pot of water. The recipe below is a good jumping off point, but feel free to make adjustments depending on what you have on hand or what's in your bag of frozen veggies. This is not an exact science so use what you like and have fun with it! Not only will you be getting the most out of the dollars you do spend, you won't have to waste money on all of those boxed stocks at the store (which are often times loaded with sodium) and you can control the quality of the ingredients. One guideline is not to use cruciferous vegetables (broccoli, cauliflower, cabbage, brussels sprouts, etc.) as they can make things a bit stinky and dominate the flavor of the stock.

Basic Vegetable Stock (*see Chicken Stock variation below)

adapted from The Master Your Metabolism Cookbook

Ingredients

1 large onion, quartered (keep the peel to add color)

1 garlic clove, peeled and chopped (feel free to use more if you're a garlic fan!)

2 large carrots, cut  into 2-inch pieces

2 celery stalks, cut into 2-inch pieces

8 ounces muchrooms, chopped

Handful of parseley sprigs

4-6 fresh thyme sprigs

1 bay leaf, fresh or dried

Directions

1. Place all ingredients in a large stock pot (I use a fryer insert for my veggies to make removal easier). Add water to cover vegetables, partially cover with lid, and bring to a boil. Reduce heat and simmer gently for 1 hour. Skim off any foam that may rise to the surface, periodically.

2. Strain vegetables from stock, cool, and store in the fridge for up to 3 days or freeze for up to 6 months.

* To make Chicken Stock, simply add the carcass of a whole chicken to the pot and increase simmer time to 4 or more hours.